It's pretty easy. Turn off all power, remove the wires from the relay, remove one of the screws at the base of the relay, loosen the other screw, remove the relay, install the new relay, tighten both screws, reinstall the wires like they were.
If you have an unused relay, you can use that as a replacement or you can get a new relay.
If you take an unused relay, tape off the small coil wires so that they don't touch anything. They should not be powered if the relay is not being used, but it's safer to cover each with a small piece of electrical tape.
Post some pictures if you need more help.
Order today, ships today. G7L-2A-BUBJ-CB DC24 – General Purpose Relay DPST-NO (2 Form A) 24VDC Coil Chassis Mount from Omron Electronics Inc-EMC Div. Pricing and Availability on millions of electronic components from Digi-Key Electronics.

www.digikey.com
Order today, ships today. G7L-2A-BUBJ-CB-IN DC24 – General Purpose Relay DPST-NO (2 Form A) 24VDC Coil Chassis Mount from Omron Electronics Inc-EMC Div. Pricing and Availability on millions of electronic components from Digi-Key Electronics.
www.digikey.com
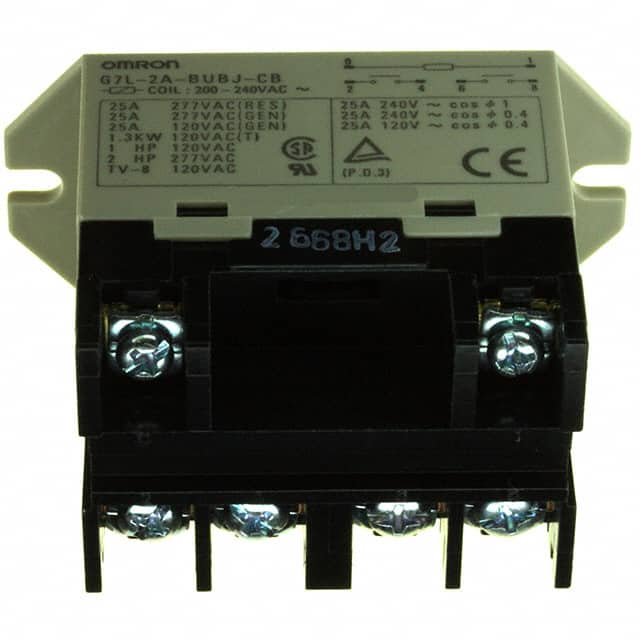
The two top screws are where the small wires from the control board connect. They supply 24 volts dc to close the relay.
The bottom 4 terminals are where the power wires connect.
You can see the base has two slots where the screws hold it in place.
Mark the wires and take pictures before removing the wires so that you can put them back correctly.