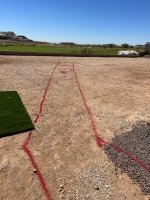
Newb OB with BYOP in Buckeye AZ - Completion and wrap up

Thank you so much for the comments @AQUA~HOLICS @ajw22 and @onBalance
Check into what the warranty from the plaster material company really covers.

I think it is worthless.

Straight from NPTs website:
Pool Finish Warranty Coverage Overview:
Pool Finish Brand Standard WarrantyApproved Applicator Warranty
ColorScapes® 10 Year LimitedN/A
JewelScapes®5 Year Limited10 Year Limited
PlasterScapes®N/AN/A
PolishedScapes®10 Year LimitedLifetime Limited
QuartzScapes®10 Year LimitedLifetime Limited
StoneScapes®10 Year LimitedLifetime Limited

What IS Covered under Warranty
Product Defects

Pigment out of specification
Pebble out of specification
Loss of color in colored quartz
Angular glass bead aggregates
Sample from NPT out of specification
Improperly labeled products
What is NOT Covered under Warranty?
Custom Colors
Poor Workmanship
Failure to Follow Batch Formulas
Hydration
Craze Cracking
Cement Clinkers
Issues Due to Poor Water Chemistry
Improper Start-Up
Scale
NOTE –ALL TERMS, PROVISIONS, AND CONDITIONS OF THE LIMITED WARRANTY ARE SET FORTH IN THE LIMITED WARRANTY DOCUMENT. THIS DESCRIPTION OF THE LIMITED WARRANTY IS A SUMMARY AND NEITHER SUPPLEMENTS, AMENDS, ALTERS, NOR MODIFIES THE TERMS, PROVISIONS AND CONDITIONS SET FORTH IN THE LIMITED WARRANTY DOCUMENT. ALL TERMS, PROVISIONS, AND CONDITIONS SET FORTH IN THE LIMITED WARRANTY DOCUMENT MUST BE AGREED TO AND SIGNED BY THE POOL OWNER IN ORDER FOR THE LIMITED WARRANTY TO BE VALID.

Yup, plaster manufacturers warranty isn't really worth much. Also, to me it seems odd that the warranty only covers material yet if you use an "approved applicator" they increase the warranty to lifetime for several product lines. What does an approved applicator have to do with the material itself?

if a blue color pigments is being considered, you should investigate all manufacturer's materials and make sure the blue pigment that is being used is colorfast.
Not using blue pigment, going with NPT Sand Mini
 
Last edited:
A little off topic, on timelapse videos, but since I start construction on Tuesday I'd like to have the setup figured out soon. I'm curious if there are any timelapse photo wizards around. I'd like some experienced folks thoughts about good economical software to create/edit, comments on my plan for setting up the photos, any comments on the camera views, and generally any other tips or suggestions.

On the software:
I have been playing around with Cyberlink PowerDirector 365. While my skills are not in video editing, I can manage to get it to work and it seems to work pretty well. A 1 year subscription is about $70 ($52 if I buy before 9/4). I'll pay that for my memento. I would like to be able to play around with how many frames per second are used and potentially even speed up certain timeframes and slow down others. I can't figure out how to do that with the way I am currently taking photos (below). I have read that Adobe Premiere Pro is probably the best and will be playing around with it using their 7 day trial, but I wonder if it is difficult to use. If I decide to go with it they charge $21 per month.

Any comments on software?

On the setup:
I have two backyard security cameras I was finally able to get set up. I have them configured take photos every 5 minutes around the clock. By the way, I am also continuously recording video and saving that as well. I expect to finish the pool in a couple months and the rest of the backyard will take another 2 months. I have 7TB of storage space so there really isn't a concern with storage, four months of photos from the two cameras will be about 105GB. When I create the timelapse video, I'll only use the photos of workdays and start just before sunrise and probably end by about an hour or two after the work ends for the day. I was thinking of increasing the frequency to every minute. Space is not a problem, but it might be too much for my best computer to handle that many photos. The computer I plan to do the video editing on is an HP Spectre (12th Gen i7-1255U 1.7GHz, 16GB RAM, 500GB SSD (400GB available).

Any comments/tips on the setup?

On the camera views:
Below are the shots from this morning from the two angles. They are fixed but I can rotate, elevate, change the angles, zoom in (they are already zoomed out the max), but they will be taken from these locations.

Any comments on the camera angles?

DR.20230831_083000.jpg
MBR.20230831_083000.jpg
 
  • Like
Reactions: derekbishop
Well the layout is now complete by someone who knows what they are doing as opposed to an idiot with a tape measure (me). Took him only 1 hour. I spent over 3 when I did it (although I did layout the rest of the yard). I'll be going back out with my tape measure today to check overall dimensions and a few things for myself.

Next weeks schedule is excavation on Tuesday, plumber on Thursday (in case we have a hard dig), and steel either Friday or Monday. Hard dig odds are 50/50 in our area. Both next door neighbors didn't have a hard dig so odds are against me that I'll be the one to have it. Seriously though, the excavator has dug many of the pools in the area and said it really is a Crud shoot. We'll see soon enough.

Oh, and our non-existent monsoon decided to play a little catch up yesterday. Hopefully that's it until I can get the shotcrete completed.
DR.20230901_094100.jpgMBR.20230901_094100.jpg
 
  • Love
  • Like
Reactions: kimkats and Newdude
What direction does picture #1 face? What direction are your prevailing winds?

Don't understand why there are skimmers on either end of the pool. Skimmers should face prevailing winds.
 
Hey @PoolStored, thanks for the question.

Picture 1 faces primarily South and a little East. Apple's iOS compass shows our backyard is at 150 degrees.

I looked at the rose chart and it shows the prevailing winds out of the East (maybe I have it flipped and prevailing is West). Regardless, the second dominate wind direction is basically 180 degrees from prevailing. Am I reading it right? A little odd to me, never lived here until now. Where would you put the two skimmers?

I forgot to drive a stake in the ground with a little fabric to see which way the wind blows in our area. We are bordered by some mountains to the West and North so maybe our location's wind rose would look different. I might do that to see for the next three days and might switch it around. Comments.
Wind Rose.jpeg
 
If I understand, here is your house/pool overlaid onto wind. Blue line through center of pool is aligned to 150. Yellow would be best spots for skimmers...

There are other factors to consider too. Do you want them there? Can they be placed there? Cost implications of changing the locations...etc.

1693594286976.png
 
It's not too late. Only paint on the ground! Take a look at my current design with the benches and returns. I don't think I'd want the returns right over the bench (at least at the deep end). Maybe put in the same corner but on the short sides, somewhat like below. Would the returns still be ok if I move the skimmers as shown?

Construction Plan 2 Skimmer Move.jpg
 
Last edited:

Enjoying this content?

Support TFP with a donation.

Give Support
Well I played around with Cyberlink PowerDirector 365 for the timelapse.

My security camera settings are taking a photo every minute and the video I created is pausing each picture for 2 frames and skipping one picture. The result is every hour takes ~ 2 seconds and uses 30 pictures (from every two minutes). Seems ok to me.

Video below is from the day of the layout. Around noon I decided to put a stick by the back wall and tape a piece of light plastic 1" wide ribbon to watch the direction of the wind. I have been watching it over the last three days, and the primary direction matches the windrose. What seems to be a secondary direction is along 210-230 degrees.

Dig day moved to Wednesday. I will make my final decision on location of the skimmers tomorrow.

 
Do you plan on adding a retaining wall by the fence on the right side? Strange that the builder didn't do that to begin with. Looks like your neighbor on the left added a wall maybe when he put his pool in?
 
That is what everyone says. The neighbor to the right has a fire pit and elevated sitting area. It is the same situation with the neighbor on the left, but what you see there is the backside of an outdoor kitchen. There is a fairly steep drop of about 18" on both sides. Both of my neighbors and I are not happy with the developer that they didn't put a retaining wall there. Cheep SOB's.
 
Plumbers dropped by today before the excavation (they said they would come when the excavator is here tomorrow). I think that was for the better. That way we can get everything figured out before the excavator shows up.

They laid out the main trunk line and equipment pad. Question about my "future" heater placement. I knew it had to be 4' to the closest opening of a window/door. Where is the four feet specifically measured from on the heater? And it is measured as a straight distance? The depiction below from Pentairs Mastertemp Heater manual looks like it is measured from the closest point of the exhaust to the closest opening (door or window).

Where the plumber laid everything out the top of the heater will sit about 30 inches below the window opening, about 2 feet to the side and about 1 foot away from the wall. When I measure straight from the closest point of the window opening to where I think the heater exhaust will be it seems like we are just over 4'. All good?


Installation Location Requirements.png

Equipment Pad Layout IMG_5108.jpg
Pic note: from right to left, filter, pump, heater (almost looks like sideways T), chiller, intellicenter

By the way, the plumbers wanted a 2'6" wide pad for the filter, pump, and future heater and a 4' wide pad for the future chiller. It would still be about 14' long. They felt this would work well for all the lines to come up down by the pump and filter.

And since there is one thing I know, TFP 🫶 pictures, so here are a few of the main trunk line.

IMG_5110.jpgIMG_5111.jpgIMG_5112.jpg
 
Where is the four feet specifically measured from on the heater?
However the inspector chooses to interpret it. You may be able to win them over, you also may not. You can be entirely right and still wrong, so I always advise anticipating that hiccup.

My inspector went so far as to conflict himself, mid inspection. I put an alarm on my French door as the screen door (rightfully) wasn't an acceptable barrier. He then wanted an alarm on the screen door also so we could leave the big door open on breezy days. Luckily he listened to reason or I would have been rescheduling a 2nd inspection after buying a 2nd alarm. Ironically, the sound logic about the screen door not being a safe barrier didn't sway him, it was the fact that my door alarm couldn't be disabled so we couldn't leave the solid door open. He said, 'oh, ok. If you can't leave the solid door open with the alarm on it than you can't use the screen door'. I had to eat ALOT of snarky retorts that day. :ROFLMAO:
 
However the inspector chooses to interpret it.
:rolleyes: :unsure: That isn't very reassuring. I guess I could call the inspectors office and see what they say. At least I'd have something to fall back on.

Oh, and nice story with your inspector. Makes you wonder their experience.
 
  • Like
Reactions: Newdude
You measure from the heater exhaust 4’ vertically and 4’ horizontally from any openings.
 
  • Like
Reactions: Turbo1Ton
You measure from the heater exhaust 4’ vertically and 4’ horizontally from any openings.
So 2 feet horizontally, 30" below, and 1 foot out from wall won't cut it. Dang, have to make one more tweak. Oh well, better now before the concrete is placed!

Thanks Allen
 

Enjoying this content?

Support TFP with a donation.

Give Support
Thread Status
Hello , This thread has been inactive for over 60 days. New postings here are unlikely to be seen or responded to by other members. For better visibility, consider Starting A New Thread.