
Sharing my experience, & tips I learned while redoing all of the mastic around our pool.
What is mastic? "Pool mastic generally refers to the expansion seal located several inches from your inground pool edge. This expansion seal is filled with mastic, a waterproof, putty-like adhesive used as a joint-sealer between concrete sections."
Tools & Materials:
Tips
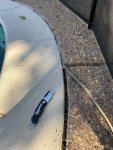
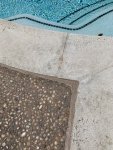
I attached some photos of how my job turned out. Thanks for reading!
What is mastic? "Pool mastic generally refers to the expansion seal located several inches from your inground pool edge. This expansion seal is filled with mastic, a waterproof, putty-like adhesive used as a joint-sealer between concrete sections."
Tools & Materials:
- Sikaflex Self-Leveling Sealant (choose the appropriate color)
- Pre-Caulking Filler Rope Backer Rod Roll (choose the appropriate length and size, I used 3/4 inch)
- Cartridge Caulking Gun, 1 Quart Size (match the size of the sikaflex tube)
- Comfortable to hold Utility Knife & extra blades
- Green Scotch Masking Tape for Hard-to-Stick Surfaces
- Shop wet/dry vac
- Gloves
- Knee pads
- Old disposable towel(s)
- 5-in-1 Painter's Tool
- Bag of sand (optional)
- Weed killer (optional)
- Leaf blower (optional)
Tips
- Make sure the weather is going to be good, esp during dry time. No wind or rain. Wind will blow all sorts of leaves, sticks, debris, etc into the drying sealant and is a messy pain to get out.
- Make sure everyone in the household knows not to go around the pool area while the sealant is drying (48 hours).
- Always have your towel at the ready to wipe little spills or to stop the flowing of the sealant when you need to take a break.
- Take breaks occasionally to give your back and knees a rest. Stand up, stretch and walk around a bit. Make sure your sealant isn't dripping out of the tube while you do though.
- Use the painters tape. Use the painters tape. Use the painters tape. This is so important as you will end up getting some of the sealant outside of the channel you are filling. Also makes for really crisp, clean lines.
- Have knee pads or something soft to kneel on. Trust me.
- Buy extra utility knife blades and make sure the knife you have is comfortable to hold for long periods.
- Make sure to tape and dam up the grooves and spaces in between your decks concrete as the sealant will find its way down those little grooves.
- Better to underfill the joints the overfill. You can always go back and layer on more sealant but wiping it away is a huge, messy pain.
- Spray some weed killer into the joint once you remove the old mastic just in case. Most likely the sealant will prevent any weeds from growing but doesn't hurt.
- Clean up and vacuum up the old mastic as you go. If not you'll have all this Crud around the pool potentially falling in or getting all over the yard.
- Remove everything from around the pool to give you space to work and not obstruct your progress.
- Use your utility knife to start removing the old mastic. Depending on the old stuff and how dried out it is this can be super easy or can be a living nightmare. Cut at the edges up against the sides of the joints to try and get it to peel off from the edges. A comfortable utility knife is key here. (This can also be done with an oscillating tool but I did not have one. Your hands may thank you if you use one though.)
- Once you get the big chunks of mastic out, work away at the remaining bits from the edges of the joint, removing as much as you can without damaging your deck. This is where the extra utility knife blades come in handy since you'll be scraping it along the decking. You don't need to perfectly remove it all although try to get as much off the top of the joints if you can just to make the end job look that much cleaner.
- After all the mastic is removed from the joints, start vacuuming up the inside of the joints getting all the debris and loose bits out. You may also need to remove the old backer rod foam that was in the joint to make room for the new one however I was able to just push down the old foam further into the crack which gave me enough room to put in the new foam rod.
- Put in the new foam rod. Push it in using the 5-in-1 tool. Leave 1/4 to 1/2 inches of space between the rod and the top of the lowest part of the deck. (Sometimes the deck and coping are not level with one another, go off of the lowest part as the sealant will not dry at an angle). There were definitely areas where I had more than 1/2 inch of space and for those I tried to fill with a little sand to level out but also I just used extra sealant and it worked fine. The main thing is making sure there are no little cracks where the sealant can leak down past the foam rod.
- Apply the rough surface painters tape all around both sides of the joint. Make sure to dam up the cracks and joints on the deck/coping with tape so that the sealant doesn't leak into them. Get tape that's wide enough to catch any stray spills from the caulk gun. This step is VERY IMPORTANT as it will make your life much easier and the end job much cleaner looking.
- Check your time and make sure you have everything you need to apply the sealant. Make sure you have the time to start applying the sealant and letting it dry enough to remove the tape. You can break it up into a couple of sessions but probably best to do it all in one go. Removing the tape a couple hours after you apply the sealant is a must, so make sure you have the time to do so.
- Towel by your side, knee pads on, sealant loaded up in the gun, begin filling in the joints. Better to underfill than overfill the joint. You can go back and top it off once the sealant levels out and you know how much more space you need to fill. Take your time and start applying the sealant. You'll get a feel for how much and how fast after a few minutes of using it.
- At this point you can choose to sprinkle the play sand on top of the drying sealant to give the joint a more textured look. This looked really nice with our rough flagstone decking but on maybe more modern looking pools you wouldn't want this look. Just make sure to do this while the sealant is still wet and sticky.
- Once the joints have all been filled and are fairly level with the decking/coping let it start to dry for an hour and a half or two hours. Slowly start removing the painters tape. Do this gently as it can pull up the sealant a little on the edges. Just take your time. This part is important to get clean lines and a professional look.
- Let it dry for 48 hours without getting it wet or disturbing it.
- Use a leaf blower or broom to remove loose debris and sand from around the pool.
- Congrats you saved yourself a good chunk of cheddah, gained the admiration & respect of your friends & family, as well as the self-satisfaction of doing it yourself!
I attached some photos of how my job turned out. Thanks for reading!
Attachments


Last edited:
