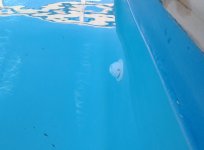
- Jun 22, 2014
- 51,990
- Pool Size
- 17888
- Surface
- Fiberglass
- Chlorine
- Salt Water Generator
- SWG Type
- CircuPool RJ-45 Plus
After 9 years it finally happened – the dreaded leak. Here is my story.
In the San Antonio area we have black clay soil that is horrible for structural support of any kind and often causes problems for home foundations, fencing, asphalt, pools, etc. When we observed excessive water loss, I hoped it was weather related since there were no signs of a leak at ground level anywhere (pressure side). No loss of prime or excessive air in the pump (suction side). It has been extremely windy in our rural area for several weeks, and my chemical levels remained steady, specifically my salt, CYA, and CH, so I remained optimistic it was not a leak. Now that it’s November we’re seeing a big difference between the mild water temperature and that of the drier, cooler ambient air, which can also influence evaporation. You can check your own anticipated evaporation rates using THIS LINK. Still, something didn’t seem right. I ruled-out a leak at the equipment pad and my filter drain line was dry. I attempted dye testing at all areas in the pool shell (jets, lights, skimmer) with no obvious indication of a leak. I have six returns jets that are all tied-in on the same line, so my biggest fear was that there was a break in my pressure side return jet line or at one of the jet connections.
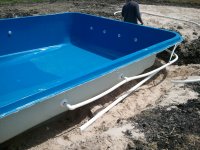
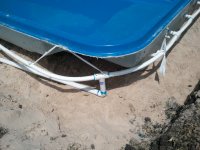

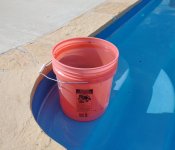
First I started with a bucket test. Free & easy. I tried it several ways: No changes to pump or system operation, pump off, plugging the return jets with closure plugs, etc. Each of these in an attempt to diagnose to some degree where the leak could be (static, suction, or pressure). What confirmed my fear was when I plugged the return jets. The bucket test result – no water loss the following days with the return jets plugged. Now I was 99% sure the leak was in my return line to the jets. Before I called a leak detection company, I did a couple more things. I was allowed to keep the pump running since I have a separate waterfall return line that I was able to divert into the pool to keep water moving to circulate chemicals and prevent algae. Then I wanted to experiment by making my own pressure tool.
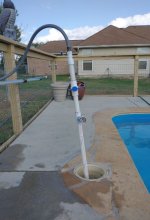
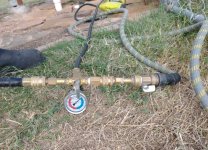
So as a final test while waiting a leak detection company to pinpoint the leak, I created two water pressure leak tools as seen below. One tool (the long one) is designed to go in the skimmer (suction) and the other tool for the return jet line (pressure) that goes into my 3-way valve back to the pool. I obtained all the parts below from my local hardware store with the exception of the pressure gauges that I ordered online. These are low-psi (glycerin-filled) pressure gauges that would provide easy-to-read (low pressure) readings for this purpose (pools).
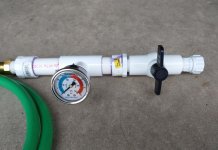
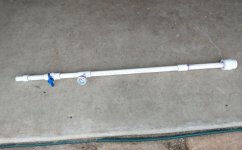
The suction line tester screwed easily into the skimmer, so I simply closed the 3-way valve at the pad and performed the test by increasing the pressure slowly to about 15-20 psi then closing incoming water. After increasing the water pressure, it held to my satisfaction, so I could formally rule-out the suction line. For the pressure side, I simply removed the 3-way valve handle/cover and inserted the tool there.
Now that I confirmed a pressure line problem at the return jets, it was time to call a leak detection company to pinpoint the area. They use a combination of water and air pressure, coupled with specialized listening devices (i.e. deck plate) to search for the leak and try to pinpoint it. This would help later for minimal invasion to the ground or decking areas. In my case it wasn’t so easy. They could not pinpoint the sounds being heard to a specific location. I listed myself and understood it was not that easy.
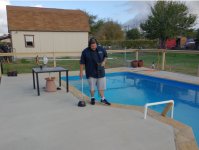
Instead, the techs grabbed their camera gear and more dye.
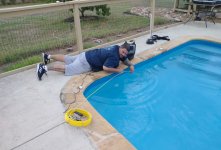
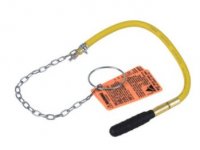
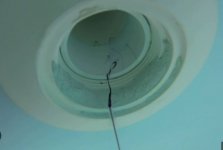
Eventually they found the culprit – a crack at the return fitting. Here is an example of the troublemaker. Look closely in this example. The break was at the rear of the return jet fitting (threads) in the 12 o'clock position where the PCV line is glued in to the fitting. My guess is the water line behind the shell dropped over time lifting upwards in the fitting causing a break at the top inside.
So now I had 3 options:
1 – Let them cut concrete, dig down, and completely replace the return fitting at the tune of about $2,000.
2 - Try to apply some A&B Epoxy into the crack. It might work, or only last for a while until the pipe shifts again.
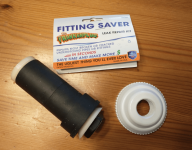
3 – Use a Frakenplug that costs about $90.
I have elected to go with the Frakenplug for now and see how it lasts. Here is how it works.
Moral of the story …… leak detection can be very tricky. Not always "in your face" obvious. If you suspect a pool leak, take it one step at a time. Follow a simple process of elimination between the pool shell (static-structural), pressure side, then the suction side. See the YouTube links below for some great illustrations. Not all leaks show themselves with chemical changes, colored dye, etc, so be prepared to think outside the box. Leave nothing to chance. You may even consider shopping for a few basic tools or parts so you can do a DIY test like I did before calling a professional. You’ll be more informed and confident when discussing the situation, repair processes, and potential fees. It might even save you some time and money. In my case, having the leak narrowed down in advance and knowing some background in pool plumbing helped save some time and in-turn saved me a few bucks with the leak detection company.
Speaking of leak detection companies, shop around. I called about 4 of them, including American Leak Detection who seems to have a good reputation. I did not chose them because I did not like their quote or how they interacted with me. Very impersonal in my case. So if anyone in the local San Antonio area needs help wit leak detection, PM me and I'll be happy to let you know who performed my testing.
Below are some helpful links. Good luck!
 www.troublefreepool.com
 www.troublefreepool.com
YouTube Links:
In the San Antonio area we have black clay soil that is horrible for structural support of any kind and often causes problems for home foundations, fencing, asphalt, pools, etc. When we observed excessive water loss, I hoped it was weather related since there were no signs of a leak at ground level anywhere (pressure side). No loss of prime or excessive air in the pump (suction side). It has been extremely windy in our rural area for several weeks, and my chemical levels remained steady, specifically my salt, CYA, and CH, so I remained optimistic it was not a leak. Now that it’s November we’re seeing a big difference between the mild water temperature and that of the drier, cooler ambient air, which can also influence evaporation. You can check your own anticipated evaporation rates using THIS LINK. Still, something didn’t seem right. I ruled-out a leak at the equipment pad and my filter drain line was dry. I attempted dye testing at all areas in the pool shell (jets, lights, skimmer) with no obvious indication of a leak. I have six returns jets that are all tied-in on the same line, so my biggest fear was that there was a break in my pressure side return jet line or at one of the jet connections.


First I started with a bucket test. Free & easy. I tried it several ways: No changes to pump or system operation, pump off, plugging the return jets with closure plugs, etc. Each of these in an attempt to diagnose to some degree where the leak could be (static, suction, or pressure). What confirmed my fear was when I plugged the return jets. The bucket test result – no water loss the following days with the return jets plugged. Now I was 99% sure the leak was in my return line to the jets. Before I called a leak detection company, I did a couple more things. I was allowed to keep the pump running since I have a separate waterfall return line that I was able to divert into the pool to keep water moving to circulate chemicals and prevent algae. Then I wanted to experiment by making my own pressure tool.


So as a final test while waiting a leak detection company to pinpoint the leak, I created two water pressure leak tools as seen below. One tool (the long one) is designed to go in the skimmer (suction) and the other tool for the return jet line (pressure) that goes into my 3-way valve back to the pool. I obtained all the parts below from my local hardware store with the exception of the pressure gauges that I ordered online. These are low-psi (glycerin-filled) pressure gauges that would provide easy-to-read (low pressure) readings for this purpose (pools).


The suction line tester screwed easily into the skimmer, so I simply closed the 3-way valve at the pad and performed the test by increasing the pressure slowly to about 15-20 psi then closing incoming water. After increasing the water pressure, it held to my satisfaction, so I could formally rule-out the suction line. For the pressure side, I simply removed the 3-way valve handle/cover and inserted the tool there.
Now that I confirmed a pressure line problem at the return jets, it was time to call a leak detection company to pinpoint the area. They use a combination of water and air pressure, coupled with specialized listening devices (i.e. deck plate) to search for the leak and try to pinpoint it. This would help later for minimal invasion to the ground or decking areas. In my case it wasn’t so easy. They could not pinpoint the sounds being heard to a specific location. I listed myself and understood it was not that easy.

Instead, the techs grabbed their camera gear and more dye.

Eventually they found the culprit – a crack at the return fitting. Here is an example of the troublemaker. Look closely in this example. The break was at the rear of the return jet fitting (threads) in the 12 o'clock position where the PCV line is glued in to the fitting. My guess is the water line behind the shell dropped over time lifting upwards in the fitting causing a break at the top inside.

So now I had 3 options:
1 – Let them cut concrete, dig down, and completely replace the return fitting at the tune of about $2,000.
2 - Try to apply some A&B Epoxy into the crack. It might work, or only last for a while until the pipe shifts again.
3 – Use a Frakenplug that costs about $90.
I have elected to go with the Frakenplug for now and see how it lasts. Here is how it works.
Moral of the story …… leak detection can be very tricky. Not always "in your face" obvious. If you suspect a pool leak, take it one step at a time. Follow a simple process of elimination between the pool shell (static-structural), pressure side, then the suction side. See the YouTube links below for some great illustrations. Not all leaks show themselves with chemical changes, colored dye, etc, so be prepared to think outside the box. Leave nothing to chance. You may even consider shopping for a few basic tools or parts so you can do a DIY test like I did before calling a professional. You’ll be more informed and confident when discussing the situation, repair processes, and potential fees. It might even save you some time and money. In my case, having the leak narrowed down in advance and knowing some background in pool plumbing helped save some time and in-turn saved me a few bucks with the leak detection company.
Speaking of leak detection companies, shop around. I called about 4 of them, including American Leak Detection who seems to have a good reputation. I did not chose them because I did not like their quote or how they interacted with me. Very impersonal in my case. So if anyone in the local San Antonio area needs help wit leak detection, PM me and I'll be happy to let you know who performed my testing.
Below are some helpful links. Good luck!

Leak Detection
A number of things can cause leaks in your pool. You can learn tricks for leak detection and how to pinpoint where your pool is losing water.
Water Leaks - Further Reading
YouTube Links:
Last edited:


