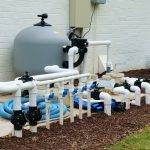
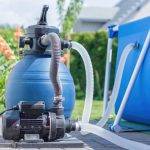
While most people know that a filter is a key component of a swimming pool’s filtration system, quite a few do not realize that the filter needs to be cleaned periodically to insure proper equipment performance and cleanliness of the pool water. This article will discuss why maintenance cleaning is a good idea, then tell how to clean each of the 3 types of filters; cartridge (or cart), sand and finally both types of the Diatomaceous Earth (DE) filters.
When your filter was new the water could easily pass through it – the pounds of pressure per square inch (psi) shown on the filter’s pressure gauge probably reads somewhere around 8 to 25 psi, depending on your pool and plumbing set up. As the filter does its job and filters, the debris in the water accumulates in the filter, the filter slowly gets clogged with debris and the pressure rises. When the pressure rises by 25% over your starting pressure it’s time to clean out the debris that has been collected by the filter so you have room to catch any new debris that enters the pool. Failure to keep the pressure in the normal range can greatly reduce your water flow, resulting in cloudy water, poor circulation and excessive wear on the pool equipment.
How long you can go between backwashings/cleanings of the filter varies quite a bit from pool to pool, depending on the relative size of the filter and the pool. Some people need to clean their filters weekly, others can go an entire season without needing to clean the filter. It is always a good idea to clean the filter at least once a year, even if the pressure doesn’t go up.
Cartridge
To clean a cartridge filter, the pump must be turned off. If the filter is below the water level of the pool, there should be valves that have to be closed to prevent the pool from draining when the filter is opened. Open the air bleed valve on the top of the filter and the drain port on the bottom of the filter and allow the water to drain out. Then open the body of the filter (this may involve unscrewing some knobs, removing a nut at the top, or removing a bracket) and remove the cart or carts. Make sure you note their position and orientation so you have no trouble reassembling the unit! Rinse out the filter tank and take the carts to where you want to clean them. All you need is a garden hose with a nozzle. A small fixed brass nozzle, sold by many hardware stores, works best. Wash the carts from the top to the bottom aiming ~ 45 degrees down at them. Please remember to wash both the outside portion and the inner portion – it’s a good idea to start at an identifying point on the cart and wash all the way around, then repeat on the inside. Once finished, reassemble the filter, close the drain port, open any valves you might have closed, turn the pump back on, when water runs steadily out of the air bleed valve close it, and you’re good to go until the pressure raises again. If the pressure after cleaning does not return to your standard starting pressure you will need to do a more through cleaning, see this post for more details.
Sand
Sand filters will have either a push/pull main valve or a multiple position valve (multiport) for cleaning the debris trapped by the sand. Whenever changing the position on the main valve, you MUST have the pump off or you will break something. First make sure that any valve on the discharge/waste line is open and any discharge hose is attached and rolled out to where you want the dirty water to go. After turning off the pump, move the lever to the “BACKWASH” position and restart the pump. Most multis have a view glass so that you can see the debris coming out of the filter, other filters will have a section of transparent pipe on the backwash line. The water will run clear for a moment, then get dirty, and finally run clear again. When the water in the glass is ~ clear, turn off the pump. If you have a multiport valve with a “RINSE” setting, switch the multiport to “RINSE”, otherwise switch to “FILTER”, and run the pump for about 15 seconds. Repeat the backwash cycle. Finally, reposition the valve back to the normal “FILTER” position, and you’re all set until the unit needs to be cleaned again. Please note that this process removes water from the pool, so be sure to keep an eye on the water level and don’t start the cleaning process if the water is already low! For more detailed information on cleaning Sand filters, see this post.
DE
DE filters come in 2 varieties, the first makes use of a push/pull or multiport valve for the cleaning. With this kind of DE filter, the cleaning procedure is exactly the same as cleaning a sand filter. The only difference is that much of the DE is removed along with the dirt, and therefore you have to add more after cleaning the filter (sand is not removed when backwashing, so doesn’t need to be replaced). Because the backwashing doesn’t remove all of the DE, only add ~80% of what the filter calls for when new or fully clean so that the filter doesn’t clog with clean DE. Once in a while it is necessary to open up a DE filter and do a much more through cleaning. For more detailed information on cleaning DE filters, see this post.
The other kind of DE filter utilizes a handle on top of the filter to shift the internal assembly up and down, or “bump” it. This knocks the DE and dirt off of the filter and down to the bottom, reducing the filter pressure and is known as a “bump filter”. To clean a bump DE filter, turn off the pump, open the air valve on the top for about 5 seconds and close it again. Now slowly push the handle down and quickly raise it up 5 times. Restart the pump and check to see that the psi dropped more than 2 psi. If it did, you’re all set and you don’t need to add any new DE to the filter. If it didn’t drop enough, repeat the bumping procedure, remove the plug from the bottom of the filter and run the pump another 30 seconds. Replace the plug, open the air valve on top and run the pump until water is coming out of the air valve. Do this whole process twice and you’ll be all set to add ~80% of what the filter calls for when new, just like the other type of DE filter. Once in a while it is necessary to open up the filter and do a much more through cleaning.
Whichever type filter you have, if you remember to keep an eye on the pressure gauge and perform the backwashings/cleanings as needed so that you never encounter poor filtration, cloudy water nor costly equipment repair/replacement. It only takes a few minutes a month to keep the filter working perfectly, prevent these issues, and allow you to enjoy a Trouble Free Pool!


