There are many ways to winterize a pool, varying both by how far north or south you are and by personal preference. This is an example procedure written by an in-ground pool owner in Maryland.
Prep – Double check that the winter cover is still in good shape and that you still have enough water bags that don’t leak to go all the way around the edge of the pool plus a few for spares. While you wait for the water temperature to drop below 60 degrees, let the water level drift down a little so it is closer to the bottom of the skimmer, instead of near the top where you keep it during the summer. This will save a little time later.
Wait – Wait to close until the water temperature is solidly below 60 degrees. Below 60 degrees algae is fairly unlikely to grow and when it does it grows very slowly.
Balance – Bring PH to between 7.4 and 7.6 and make sure TA and CH are within recommended ranges.
SLAM – Two or three days before closing, add chlorine until you achieve SLAM FC level and maintain until FC holds overnight (which it generally does on the first night). Then let your FC level fall to 20% of your CYA, typically another day and a half.
Time to close – Everything from here on is done in a single day. With two helpers it normally only takes an hour of work over two or three hours of time (draining takes a while).
PolyQuat – Add the startup (maximum) dose of PolyQuat according to package directions.
Clean – Clean up any leaves, dirt, etc in your pool water. Then, don’t worry about any leaves that fall in while you’re finishing the closing process.
Store equipment – Remove the ladders and any other removable equipment, toys, patio furniture, etc, and store it all for the winter. Ladders can be difficult sometimes – be sure any clamps or locks are fully released. Generally a few minutes of pulling and wiggling around, alternating with a helper, and they will come out.
Closing supplies – Get out the winter cover. Fill the water bags one half to two thirds full and place them out of the way around the pool.
Drain – If you have a main drain, simply use that! Otherwise, pump the water down till it is about four inches below the bottom of the returns. Usually you can achieve this with your pool pump and a vacuum hose to allow the pump to stay primed. Set up a vacuum hose as if manutally vacuuming so the pump can still draw water below the skimmer level. Some times too much air gets in and you lose prime, so you’ll have to switch to the cover pump.
Remove fittings – Remove skimmer basket(s) and return eyeball(s).
Blow out the lines – This is a chore where having the right tool makes all the difference. A “Cyclone” blower is considered by many to be the gold standard for clearing lines. While it is an investment, it’ll pay for itself usually after one closing. A Cyclone is ideal because it produces a large and continuous volume of air to clear multiple plumbing lines across most residential applications. A regular air compressor or ShopVac might be suitable if the plumbing isn’t too extensive. When blowing out the lines, it is important to know your system, plumbing line routes, and potential connection points for the blower. These factors will determine how you begin the process – clearing multiple lines at once, or isolated suction/pressure lines one at a time. Use the blower to push air into the plumbing system and keep going until nothing but a very fine mist comes out of the other end (i.e. return jet). You may push air for a little extra time to get as much moisture out as possible. Then install your winterizing plugs.
Drain plugs – Remove the drain plugs on the pump, filter, and heater. Remove your SWG cell assembly and, if applicable, other parts of the Total Control system (sensors, acid tank, etc). Protect any exposed drain plug holes with non-hardening joint compound to prevent rust.
Anti-freeze – Add pool/RV anti-freeze (not automotive!) to the pipes at the rate of one gallon per ten feet or fifteen feet of pipe. It is a great help to have a curved funnel to get the anti-freeze into the return line.
Seal the pipes – Use expandable rubber plugs to seal the skimmer pipe, return pipe, and the unions the SWG attaches to. The skimmer also gets most of a gallon of anti-freeze on top of the plug and some torn up pool noodle foam to protect the skimmer (which will also be covered by the main cover).
Pool lights – The need to winterize your pool light(s) varies widely based on the type/model of light, method of closing, location, and degree of freezing (ice shelf) in the area. Your first resource should be the light’s owner’s manual. Some manufactures have very specific winterization instructions, while others say nothing at all. You should also check with others in your area who have experience with closing a pool and light prep (if needed). The factors noted above will determine whether the light can remain safely installed below the waterline, or if it should be removed. Those who remove their light(s) may also need to consider sealing/protecting the light conduit. If removed, owners may elect to wrap the light and leave it on the decking, while others chose to lower/suspend the light deeper in the water safely below a potential ice shelf. In the end, there is no one standard method to manage lights, so check your owner’s manual and speak to others for best practices in your area.
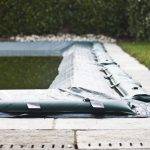
Cover – Center the cover over the pool. This is actually a fair bit of work and takes at least two people. Then press the edges down so it lies more or less flat on the water, runs up the wall, and the remainder lies flat on the deck. Water bags are then put on the cover around the entire edge of the pool. Fold any excess cover under the water bags so there is nothing to blow around. Some add a little water on top of the cover to keep it from blowing around.
Cover pump – Leave an automatic cover pump on the cover for as long as it is above freezing overnight in the fall and spring.
Leaves – After all of the leaves have fallen and dried, use a leaf blower and/or a long-handled rake to remove leaves from the cover.
Maintenance – Over the winter, keep an eye on things. Sometimes, a water bag will spring a leak and need to be replaced. Sometimes, in a big storm, a water bag will get blown onto the cover and need to be rescued.
For further ideas and variations, check out this topic, where various alternative approaches are discussed.


